How to create a Minecraft skin
There are two basic methods in creating a Minecraft skin for your character in the game.
- Edit your default skin
The first method is your default skin. You can follow the steps below to edit your default skin.
- You can download the default skin of your character from the game preferences section.
- You will get an image file (.jpg or .png) of your default skin.
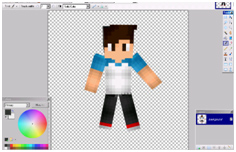
- You can easily edit this image file using any image editor such as Gimp, Adobe Photoshop or Microsoft Paint.
- Once you edited the image file, you need to upload the file from the preferences section of the game.
- After the upload, you will be able to see the preview of the edited version of the default skin.
- When you edit the PNG file manually, you will have to make sure that you don’t change the original dimensions, and make the background of the skin image completely transparent. Otherwise, Minecraft will not be able to read your skin image.

- Using Minecraft skin editor tool
The better option to create your own image is to use the Minecraft Skin Editing tool. You can follow the instructions below to use Minecraft skin editor.
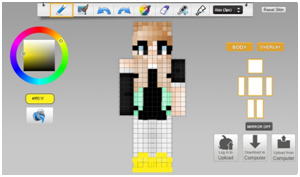
- Open the Official Minecraft Skin Editor using your web browser.
- You will see a colorless character model made with empty boxes.
- The character will have four sections, a head, two arms, a chest and two legs.
- There will be a color wheel on the top-left side of the page.
- You can choose a color from the color wheel and click on each square of the character to apply color.
- You can also use the eraser tool to remove color from any box you want.
- You can rotate the model by dragging the empty space around the model.
- Once you create the skin of your choice, you can download it to your computer.
- The tool also gives you a real time preview of your character during the whole editing process.

How to download a premade skin
One of the major advantages of Minecraft is that it allows you to create anything you want. You can also play the game with your superhero characters such as batman, superman, etc. You don’t need to do the hard work of creating the skin for your character. There are many pre-made skins available online that let you customize your character according to your dream. You can follow these steps to download your favorite skin. There are plenty of other organisations who offer everything you need to know, such as the Team Visionary making a minecraft skin resource online.
- Go to the MinecraftSkindex website. You will see a skin index, which has a large library of free and premium skins for the Minecraft characters.
- You can also download your favorite skin from any trustworthy website that hosts Minecraft skins.
- First choose a skin from the website that you would like to use for your character.
- If you want to download a specific skin, you can search from the search bar at the top right corner of the page.
- The website also allows you to use filter options, if you want to see the latest or top skins, click on the respective tab.
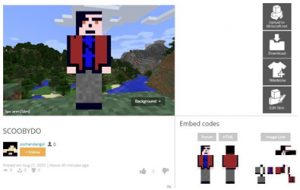
- Once you select the skin of your choice, you can click on the download button on the right side of the page to save the skin file.
- Make sure that your downloaded skin file is in PNG format.
- You can also modify the downloaded skin using any image editor.
How to upload a skin into Minecraft
Once you have created or downloaded the skin of your choice you can easily upload it in the game, but the procedure to upload the skin can differ between platforms. Below we will discuss how to upload the skin in Minecraft on PC, console and mobile.

- Uploading skins in Minecraft on PC
The process of uploading skins in Minecraft on PC is easy as compared to other platforms. Once you created or downloaded the skin that you want to use for your character, you can follow the steps below to upload the skin in Minecraft on PC.
- Open the website of Minecraft by using your browser.
- Open the menu icon, and click on the profile option, this will ask your login details.
- Log in with your account associated with Minecraft on your computer.
- Now hit the browse button, it will ask to upload an image file.
- Select the skin file (.png), which you downloaded or created earlier.
- Now click on the save option to start uploading your custom skin to the game.
- Once you successfully upload the custom skin, it will get applied automatically to your Minecraft character.Uploading skins in Minecraft Pocket Edition
If you are playing the Minecraft pocket edition on your smartphone, you can easily change the skin of your character. Although Minecraft PE doesn’t offer the full Minecraft gaming experience, it gives you the convenience to change the default skin. You can follow the steps below to upload skin in Minecraft PE.
- Once you have created or downloaded the skin for your character in the game, you can upload it to Minecraft PE.
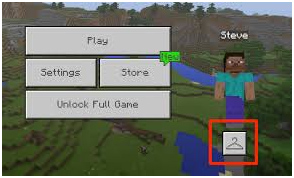
- Launch Minecraft Pocket Edition and tap on the coat hanger option located at the bottom-right corner of your screen.
- Now select the blank skin option located at the top-left side of the screen.
- When you will tap on the blank skin option, it will ask you to choose the new skin for your character.
- Now select the newly created or downloaded skin from your smartphone.
- Select the standard or slim skin model, and click the confirm button to apply your skin.
- The uploaded skin will become your character in the game.

- Uploading skins in Minecraft on console
Changing the skin of your Minecraft character on console is a bit difficult. Since you cannot download and save the custom skins on most consoles, you need to select from the list of limited skins that are available for the console. You can follow the instructions given below to change the skin for your character on the console. We have also added some interesting resources on our Minecraft server types page for you to learn more from.
- Open Minecraft on console.
- Go to the main menu, and select the help and options.
- You will see a list of options, choose the change skin option from the list.
- Browse through the available skin packs, and select a skin pack you want to get.
- If your selected skin is free, it should become the default skin of your character, but if your selected skin is not free, you will have to purchase it from the store.
Skin Customization in Java Edition
In Java Edition, a player can easily change the skin for the character by uploading a modified PNG image of a skin from the preferences section of the game. The uploaded image file replaces the default skin of the character. Java Edition also allows players to have three or four pixel wide arms for their characters.
Skin Customization in Bedrock Edition
In Bedrock Edition of the game, a player can easily change the skin of the character from the skin settings of the game. You can customize both default skins of the game. Bedrock Edition also allows players to download and use Skin Packs from the marketplace. Why not listen to the official Emerald World podcast here, its packed with some great blog news.
The character creator for Bedrock Edition
The Bedrock Edition of the game offers a useful feature for the players known as the character creator. Players can conveniently customize the skins using free and paid accessories from the marketplace. The character creator feature can be used by selecting the player’s profile option. You can wear clothing items and accessories can be earned by successfully completing different achievements. The official Emerald World blog is now live too, so why not take a look.
Skin Packs for Bedrock Edition
Skin Packs is the most attractive feature in Bedrock Edition. It allows players to quickly download the additional skins for their characters in the game. The Skin Packs can have both paid and free skins for the players. Players can easily get skins of famous characters from movies and video games. Skin packs also allow player to download several themed skins at the same time for their characters in the game.